Home / Blog / How to Convert Any Recipe to Gluten-Free in 5 Steps
How to Convert Any Recipe to Gluten-Free in 5 Steps
Five practical steps to convert any recipe to gluten-free: spot hidden gluten, choose flours and binders, adjust liquids and leavening, then test small batches.
If you want to make any recipe gluten-free, it’s not as simple as swapping out wheat flour. Gluten provides structure, elasticity, and texture in baked goods, so replicating it requires a thoughtful approach. Here’s a quick breakdown of the 5 essential steps:
- Identify Gluten Sources: Look for obvious ingredients like wheat, barley, and rye, but don’t forget hidden sources like soy sauce, malt, or processed foods.
- Choose Gluten-Free Flours: Use pre-made blends for convenience or mix your own with a balance of whole-grain flours and starches.
- Replace Binders and Leaveners: Add xanthan gum, psyllium husk, or flaxseed to mimic gluten’s elasticity. Adjust leavening agents to help with rise.
- Adjust Texture and Flavor: Increase liquids, rest batters, and use flavorful flours like sorghum or almond to improve taste and consistency.
- Test and Refine: Start with small batches, take notes, and tweak ingredients as needed. Tools like RecipeFix can simplify substitutions.
With these steps, you can recreate your favorite recipes without gluten while maintaining great taste and texture.
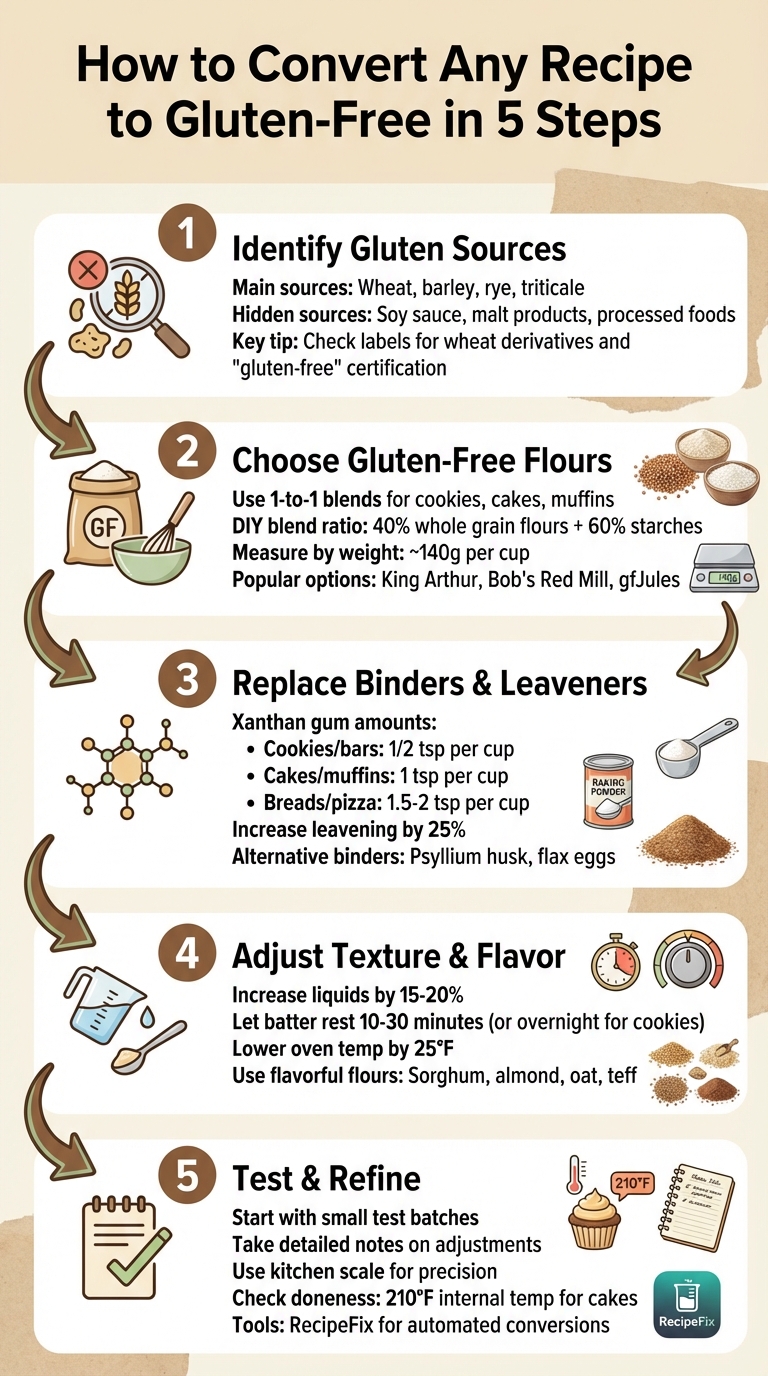
5 Steps to Convert Any Recipe to Gluten-Free
How to Convert a Recipe to Gluten Free
Step 1: Find All Gluten-Containing Ingredients
Before converting a recipe to be gluten-free, you need to identify every ingredient that contains gluten. While some sources, like wheat flour, are obvious, gluten can also hide in less expected places. Shelley Case, RD, and author of Gluten-Free Diet: A Comprehensive Resource Guide, emphasizes:
Reading the ingredients label on the foods you buy and knowing what to look for are the keys to identifying and avoiding gluten.
Start by scanning your recipe for the main gluten culprits: wheat (including varieties like durum, spelt, semolina, and farro), barley, rye, and triticale. Don’t forget wheat derivatives such as bulgur, farina, graham flour, and wheat germ. Anything with "malt" in its name - like malt vinegar, malt extract, malt syrup, or malt flavoring - typically comes from barley and will need to be swapped out.
It’s also essential to double-check grains and their derivatives to avoid missing hidden gluten sources.
Common Gluten Sources
Wheat takes many forms, from all-purpose flour to bread flour, cake flour, and whole wheat flour. Recipes might also include less familiar wheat types like einkorn, emmer, or kamut, all of which contain gluten. Barley often appears as pearl barley in soups or as malt in baked goods and beverages, where it acts as a sweetener or flavor enhancer. Rye is a staple in bread recipes, and triticale - a wheat-rye hybrid - is sometimes used in specialty baking.
Other gluten-containing items include seitan (a product made entirely from wheat gluten), couscous (a wheat-based pasta), and matzo (unleavened wheat bread). Gluten also lurks in breading, panko breadcrumbs, and "fu" (dried gluten used in some Asian dishes).
Hidden Gluten in Packaged Foods
Packaged foods often contain gluten in surprising places, as it’s commonly used as a thickener or binder. For instance, soy sauce typically includes wheat as a main ingredient. Other products to watch include salad dressings, marinades, bouillon cubes, and gravy mixes, which often rely on wheat-based thickeners.
Processed meats, such as hot dogs, deli cuts, and sausages, may use wheat as a filler or binder. Gluten can also show up in imitation seafood (like crab sticks), veggie burgers, and seasoning blends. Even unexpected items like licorice, some chocolates, and certain ice creams may contain wheat or barley malt. Allie Toren, Senior Editor at Healthline, explains:
Gluten hides in places you don't expect, like soy sauce, seasoning mixes, vinegars, and anything smoke-flavored (barley and malt are often used to get the smoke flavor).
When reading labels, look out for terms like "hydrolyzed wheat protein", "modified wheat starch", and "brewer's yeast", which are common indicators of gluten. In the U.S., the FDA mandates that foods labeled "gluten-free" must contain less than 20 parts per million (ppm) of gluten. However, if a product lacks a gluten-free label, assume it contains gluten unless you can confirm otherwise. Vague terms like "natural flavors" or "modified food starch" should be clarified by contacting the manufacturer.
Lastly, be cautious with oats. While oats are naturally gluten-free, they are often processed in facilities that handle wheat, leading to cross-contamination. Only use oats specifically labeled "gluten-free". The same rule applies to spices - opt for single-ingredient spices instead of pre-mixed blends, which may include wheat-based anti-caking agents.
Thoroughly identifying gluten-containing ingredients is the foundation for successfully adapting any recipe to a gluten-free version.
Step 2: Choose Gluten-Free Flours and Substitutes
Once you've identified sources of gluten in your recipes, the next step is selecting gluten-free flours that can mimic the structure of wheat. Unlike wheat flour, which depends on gluten for elasticity and structure, no single gluten-free flour can fully replicate its performance. As Nicole Hunn, author of Gluten Free on a Shoestring, puts it:
If you want to bake gluten free and get real results, not just 'good for gluten free', you need the right flour blend. No single gluten free flour can replace wheat flour, but a well-balanced blend can.
The choice between pre-made blends and mixing your own flours depends on what you're baking. Cookies and cakes, for example, require a different approach than yeast breads or pie crusts.
Picking the Right Gluten-Free Flour Blend
Pre-made "1-to-1" or "Measure for Measure" blends are great for non-yeasted recipes like cookies, muffins, quick breads, and cakes. Popular options include King Arthur Measure for Measure, Bob's Red Mill 1-to-1 (Blue Bag), and gfJules All Purpose, which is known for its smooth texture.
Most quality blends already include binders like xanthan gum or guar gum to replicate gluten's elasticity. If your blend doesn't, you can add xanthan gum yourself:
- Cookies and bars: 1/4 teaspoon per cup of flour
- Cakes and muffins: 1/2 teaspoon per cup
- Yeast breads and pizza dough: 1–2 teaspoons per cup
For yeast breads and pizza dough, you'll need blends with higher protein and additional binders to achieve the necessary stretch. Caputo Fioreglut, for instance, uses certified gluten-free wheat starch, making it ideal for pizza and yeasted doughs (though not suitable for those with wheat allergies). On the other hand, lighter bakes like pastries or pie crusts perform best with high-starch blends containing more tapioca or potato starch for a flaky, tender texture.
A key tip: always measure gluten-free flour by weight instead of volume. Most standard blends weigh about 140 grams per cup, but almond flour weighs closer to 112 grams, and some blends, like gfJules, weigh around 135 grams. A digital kitchen scale ensures consistent results every time.
For a more tailored approach, you can experiment with single-ingredient flours to fine-tune texture and flavor.
Working with Single-Ingredient Flours
If you'd rather create your own blend or substitute specific flours, understanding the properties of single-ingredient flours is essential. A common DIY ratio is 40% whole grain flours (e.g., brown rice, sorghum, millet, or certified gluten-free oat flour) mixed with 60% starches (e.g., tapioca starch, potato starch, or cornstarch).
Here’s a quick guide to some popular options:
- Rice Flour: A neutral choice, ideal for cakes and cookies.
- Sorghum Flour: Adds mild sweetness and a soft crumb, great for pancakes and quick breads.
- Almond Flour: High in fat and protein, perfect for macarons, dense cakes, and pie crusts.
- Oat Flour: Provides chewiness and lift in cookies, muffins, and scones.
For starches, tapioca starch adds chewiness and helps with browning, while potato starch creates a light, airy texture in cakes and muffins. Cornstarch works well in shortbread and as a thickener for sauces. Be cautious with coconut flour - it’s highly absorbent and should be used sparingly, never as the main flour.
Binders are just as important as the flours themselves. If xanthan gum isn’t available, alternatives include 1/2 teaspoon of arrowroot powder per cup of flour or a "flax egg" (1 tablespoon flaxseed meal mixed with 3 tablespoons water).
Gluten-free flours tend to absorb more liquid, so it’s essential to let your batter or dough rest for 15 to 30 minutes - or even overnight for cookie dough - before baking. This resting period allows the starches and binders to fully absorb moisture, reducing grittiness and improving texture.
Step 3: Replace Binders, Leaveners, and Other Additives
Now that you've chosen your gluten-free flours, it's time to tackle the next challenge: replacing binders and leaveners. These ingredients are crucial for mimicking gluten's role in providing structure and lift to baked goods.
Using Binders for Structure
Binders act like glue, holding everything together in the absence of gluten. One of the most common options is xanthan gum, which adds elasticity and strength. Here's a quick guideline for using it:
- Cookies and bars: 1/2 teaspoon per cup of flour
- Cakes and muffins: 1 teaspoon per cup of flour
- Breads or pizza dough: 1.5–2 teaspoons per cup of flour
If you're looking for a milder alternative, try guar gum - use 1/4–1/2 teaspoon per cup of flour.
For yeast-based recipes like breads and sandwich loaves, psyllium husk powder is a standout choice. It forms a gel-like network that traps gas and steam, creating a soft yet sturdy texture. Use about 1 tablespoon (7g) per cup (120g) of flour. If you prefer natural options, chia seeds or flaxseed meal can also do the trick. To use them, mix 1 tablespoon of ground seeds with 3 tablespoons of water to create a gel. Keep in mind that you may need to tweak the leavening slightly to avoid dense results.
Once you've got your binders sorted, it's time to focus on leaveners to ensure your baked goods rise properly.
Modifying Leaveners
Since gluten-free flours are denser than wheat flour, you'll need to adjust the amount of leavening agents. A good rule of thumb is to increase baking powder or baking soda by about 25%. For example, if a recipe calls for 1 teaspoon, bump it up to 1 1/4 teaspoons. Silas, Founder of Flavor365, explains:
Gluten-free flours are heavier than wheat flour and need more help to rise. As a general rule, I increase the baking powder or baking soda by about 25%.
If you're using baking soda, don’t forget it needs an acid to activate. Ingredients like vinegar, lemon juice, buttermilk, sour cream, or yogurt can help create those carbon dioxide bubbles that make your baked goods rise. But remember, without gluten to trap those gases, binders like xanthan gum or psyllium husk are key to maintaining structure.
Another tip is to beat extra air into the butter and sugar during the creaming stage, giving your recipe an added lift. Finally, double-check that your baking powder is gluten-free - some brands use wheat starch as an anti-caking agent.
sbb-itb-ac3a9b8
Step 4: Adjust Texture, Rise, and Flavor
Now that you've worked on binders and leaveners, it's time to fine-tune texture and flavor. Gluten-free baking often struggles with dryness and crumbliness, but with the right tweaks, you can achieve results that rival traditional recipes.
Improving Texture and Moisture
Dry, crumbly bakes are a common issue with gluten-free recipes because gluten-free flours absorb more liquid than wheat flour. To counter this, increase liquid ingredients by 15–20%. Using milk or buttermilk instead of water can add both moisture and richness. You can also include an extra egg yolk or a tablespoon of sour cream for added softness and structure.
Letting your batter rest is another game-changer. Resting allows the starches to hydrate fully, improving texture. For cakes and muffins, a 10–30 minute rest works well, while cookie and bar batters can benefit from resting overnight. As CookThisMuch notes:
This simple step can take a recipe from gritty to smooth without changing anything else.
Precise measurements are critical - use a kitchen scale to avoid density issues. Additionally, lower your oven temperature by 25°F to ensure the outside of your bake doesn't dry out before the center is fully cooked.
Enhancing Flavor in Gluten-Free Baking
Once you've tackled moisture, it's time to focus on flavor. Gluten-free flours can sometimes taste bland or even earthy, so choosing the right ones is crucial. For instance, teff adds a chocolate-like depth to cakes, while buckwheat brings a bold, nutty flavor to cookies and waffles. Sorghum flour offers a mild sweetness that's perfect for pancakes and quick breads, and gluten-free oat flour provides a toasty, wholesome taste that works beautifully in muffins and scones.
When experimenting with flour blends, start small. Replace just 15–20% of your base flour blend with a more flavorful option to avoid compromising the recipe's structure. Pair stronger flours like buckwheat with neutral starches, such as tapioca or potato starch, to maintain a light texture. A splash of vanilla or a pinch of salt can also help mask any earthy aftertastes. As Sue Gray of King Arthur Baking aptly says:
We want people to say, 'That's a good cake,' not 'That's a good gluten-free cake'.
With these adjustments, you're well on your way to creating gluten-free recipes that excel in both texture and flavor, setting the stage for the final testing phase.
Step 5: Test, Adjust, and Use Conversion Tools
Testing and Adjusting Your Recipe
Once you've made substitutions for ingredients, binders, and leaveners as outlined earlier, the next step is testing. Start with a small test batch to avoid wasting ingredients. Scale the recipe down to a quarter batch and weigh everything carefully. This is especially important because a cup of gluten-free flour can weigh anywhere from 120g to 140g, depending on the brand. Even minor differences in weight can impact the final result.
Keep detailed notes during this process. Jules Shepard, founder of gfJules, emphasizes:
Take good notes so you know what did when you go to make the recipe again!
If your test batch turns out too crumbly, try adding a binder like xanthan gum. If it's too dry, consider incorporating extra fat (like butter, oil, or an additional egg yolk) or moisture from ingredients such as sour cream or yogurt. Make one adjustment at a time so you can clearly see how each change affects the outcome.
To check if your baked goods are done, use an internal temperature of 210°F for cakes. Remember, gluten-free baked goods don’t always brown like their wheat-based counterparts. If your batch is browning too quickly but still undercooked inside, lower the oven temperature by 25°F.
Once you’ve nailed the adjustments, simplify future conversions with RecipeFix.
Using RecipeFix for Easier Conversions
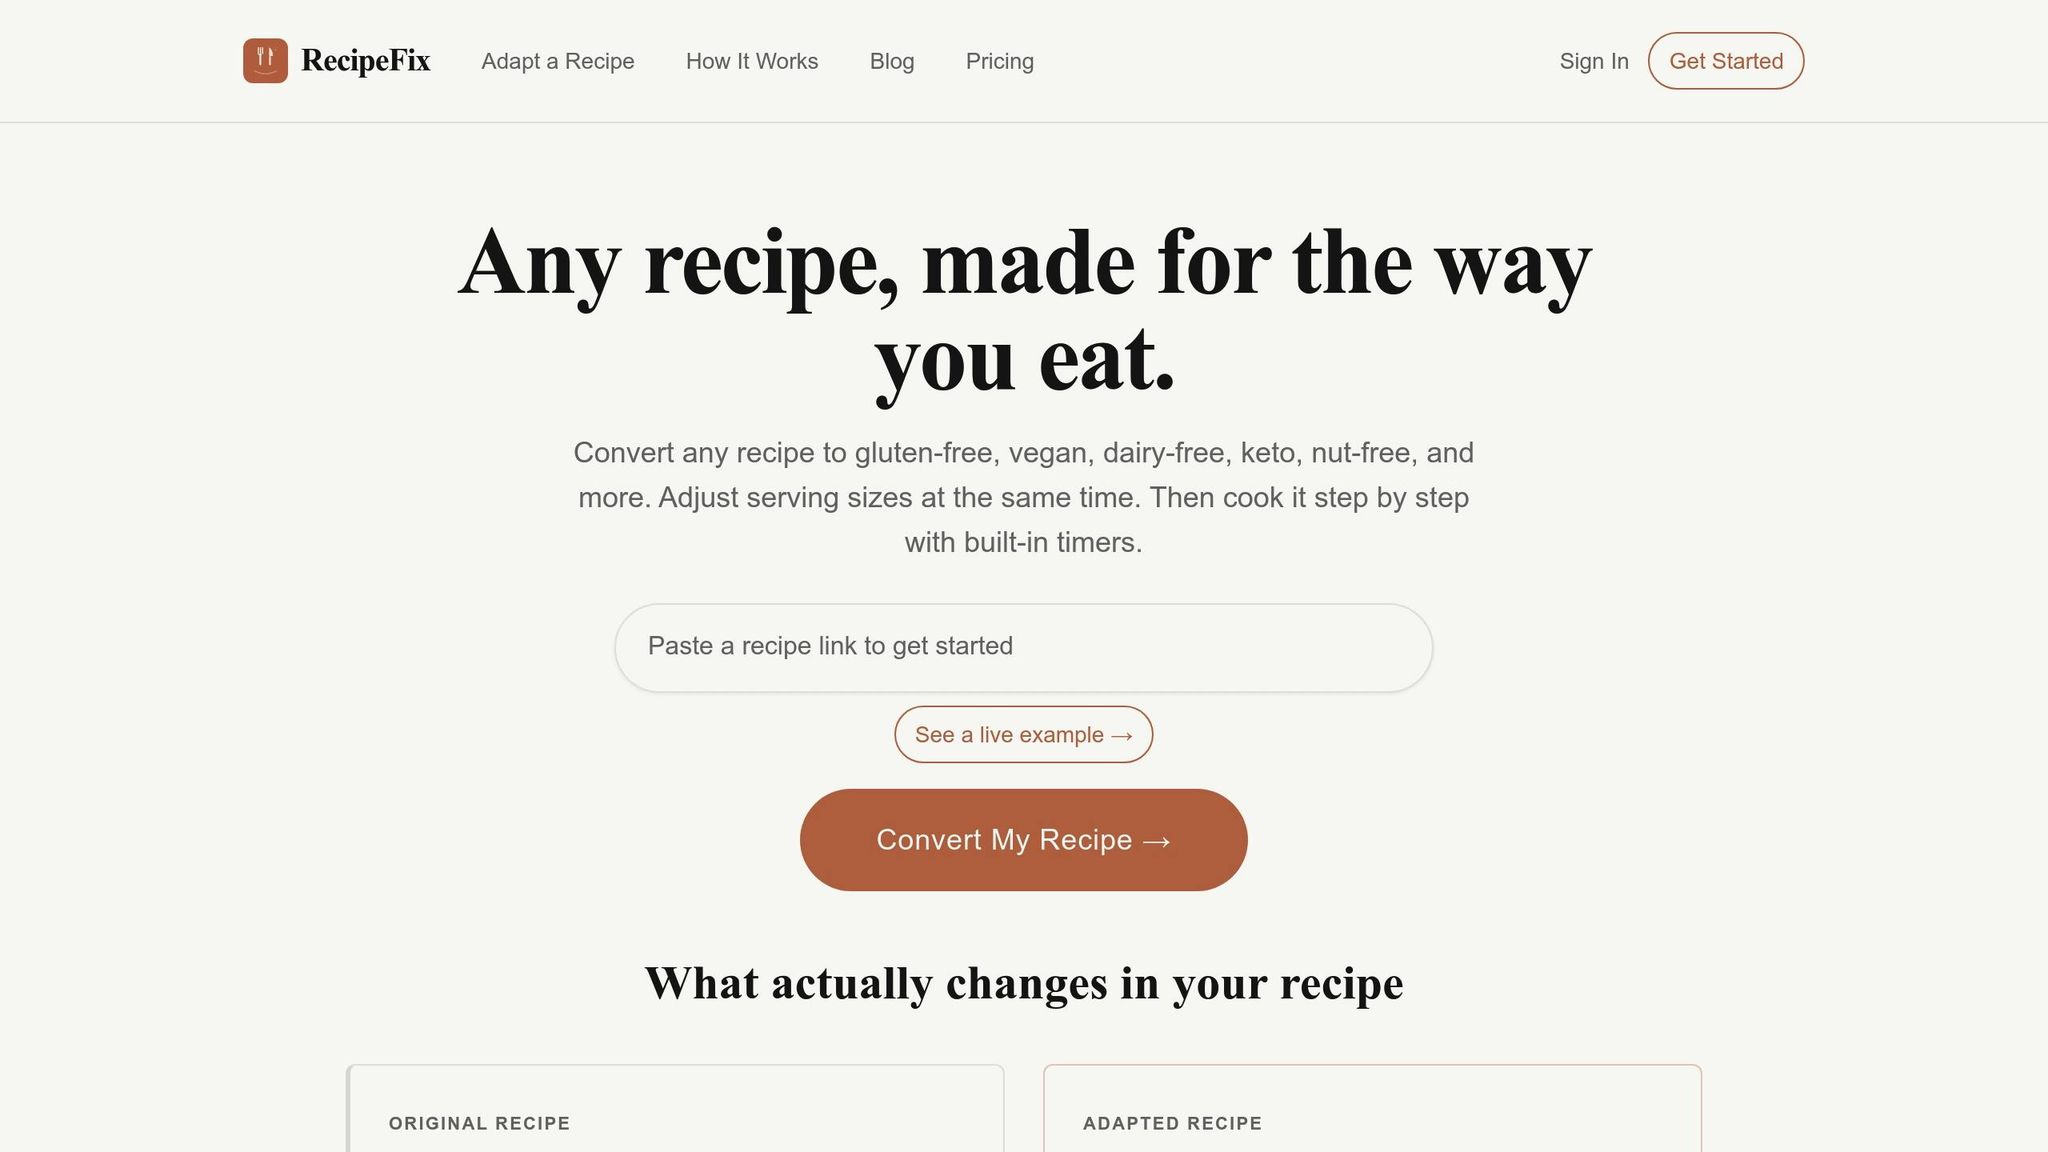
RecipeFix is a tool designed to make gluten-free recipe conversions simple. It identifies gluten-containing ingredients in traditional recipes and suggests substitutes automatically. You can also adjust serving sizes without needing to calculate anything manually, and the tool provides weight-based measurements to minimize errors.
Beyond ingredient swaps, RecipeFix offers step-by-step cooking instructions. Features like built-in timers and per-step ingredient checklists help you stay organized while baking. The free plan covers basic conversions and serving size adjustments, but if you bake often, the premium plan ($3.99/month or $27.99/year) unlocks extra customization options. Whether you're adapting a family favorite or trying out a new recipe, this tool helps you refine your process and reach better results faster.
Conclusion
Transforming traditional recipes into gluten-free delights might seem tricky, but with the right steps, it’s entirely doable. Start by identifying all sources of gluten, including those hidden in packaged foods, and choose the ideal flour blend for your recipe. For straightforward bakes, a 1:1 gluten-free flour works well. For more complex recipes, try a custom mix with 60% whole-grain flours and 40% starches. Don’t forget to include binders like xanthan gum and adjust the moisture levels to offset the higher absorption of gluten-free flours. Let batters rest to minimize grittiness, and always test small batches to fine-tune your process.
As PJ Hamel from King Arthur Baking wisely shares:
There's no hard and fast rule; I'm learning as I go, just as you are.
For an even smoother experience, tools like RecipeFix can simplify the process. In just 30 seconds, this tool identifies gluten-containing ingredients and suggests appropriate substitutes. The free version handles basic conversions and serving adjustments, while the premium plan (just $3.99/month or $27.99/year) unlocks advanced customization options for avid bakers. Whether you’re tweaking a cherished family recipe or experimenting with something new, these strategies - and a little help from RecipeFix - can lead to consistently delicious, gluten-free results. Dive in and enjoy the journey to safe and scrumptious baking!
FAQs
How do I convert a yeast bread recipe to gluten-free?
To make a yeast bread recipe gluten-free, start by swapping in a gluten-free flour blend specifically designed for bread baking. Adjust the liquid in the recipe to get the right dough consistency - it should be slightly sticky but manageable. If the flour blend doesn’t include a binding agent, add xanthan gum or guar gum to help give the bread structure.
Gluten-free dough often needs extra time to rise, so be patient. Use gluten-free yeast to ensure compatibility, and bake it at the original temperature. Keep a close eye on it, as gluten-free breads sometimes take longer to bake than their traditional counterparts.
Why did my gluten-free bake turn out dry or crumbly?
Gluten-free baked goods often face challenges like dryness or crumbliness, which usually stem from issues with moisture retention or binding. This can happen if you use too much protein-heavy flour, skimp on liquids, or bake for too long. To achieve a better texture, consider increasing liquid ingredients by 15–20%, incorporating eggs or moisture-rich ingredients like yogurt or applesauce, and slightly reducing the baking temperature to prevent over-drying.
How do I avoid hidden gluten and cross-contamination?
When trying to avoid hidden gluten and cross-contamination, it’s important to read ingredient labels carefully. Look for any potential gluten-containing ingredients and check if the product was made in shared manufacturing facilities. At home, take extra precautions by thoroughly cleaning all surfaces, utensils, and cookware. Using separate tools specifically for gluten-free cooking can also go a long way in reducing the risk of gluten exposure in your kitchen.
Adapt a recipe free with RecipeFix → · Substitution guides with exact ratios